Stable Diffusion XL is the AI image generation model and is a significant upgrade to the existing Stable Diffusion models with the ability to generate photorealistic images. In this guide, we will present detailed steps for the installation of different git, python, and Stable Diffusion XL using Automatic 1111 Stable Diffusion WebUI.
Note: For proper installation and working on Stable Diffusion, ensure your PC has a GPU and an active internet connection.
Install Stable Diffusion XL
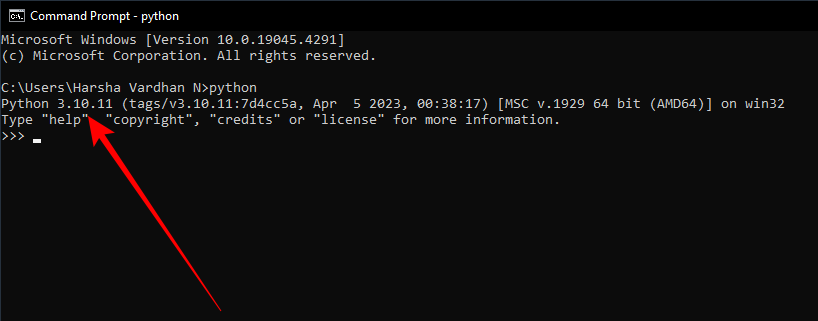
- Before beginning, verify that Python is installed on your PC. Open Command Prompt, type python, and press Enter. If Python is already installed, its version will appear.
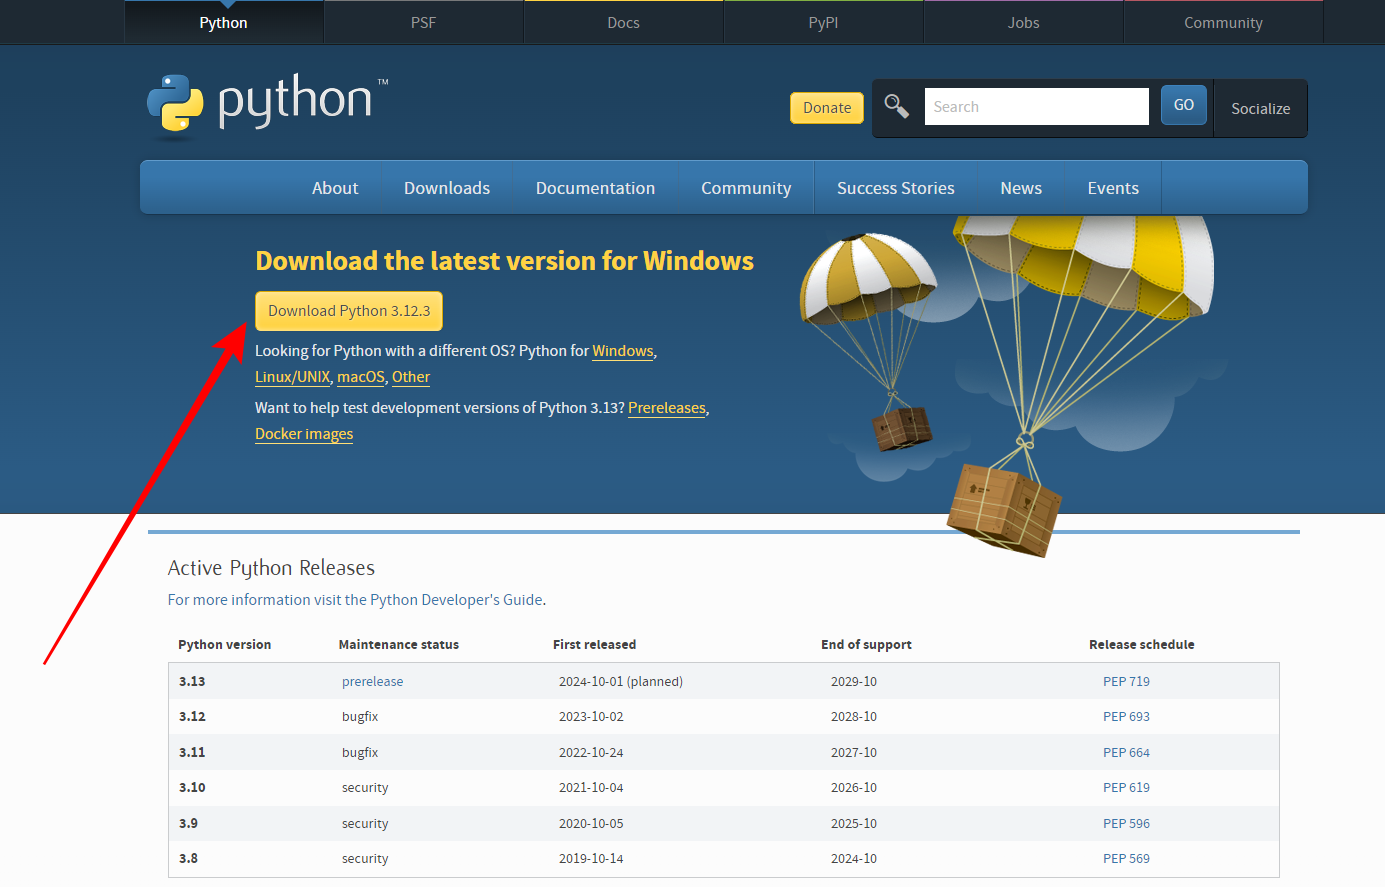
- If you don’t see the Python version, you need to install it. Open your browser and visit Python’s download page. Next, click on the highlighted Download button.
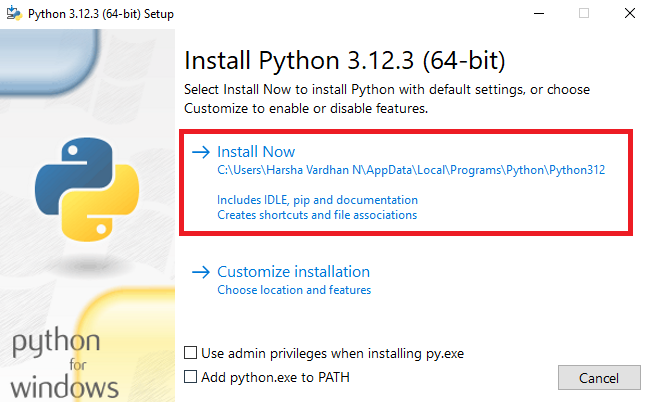
- Once the Python setup file is downloaded, open it to start the installation process.
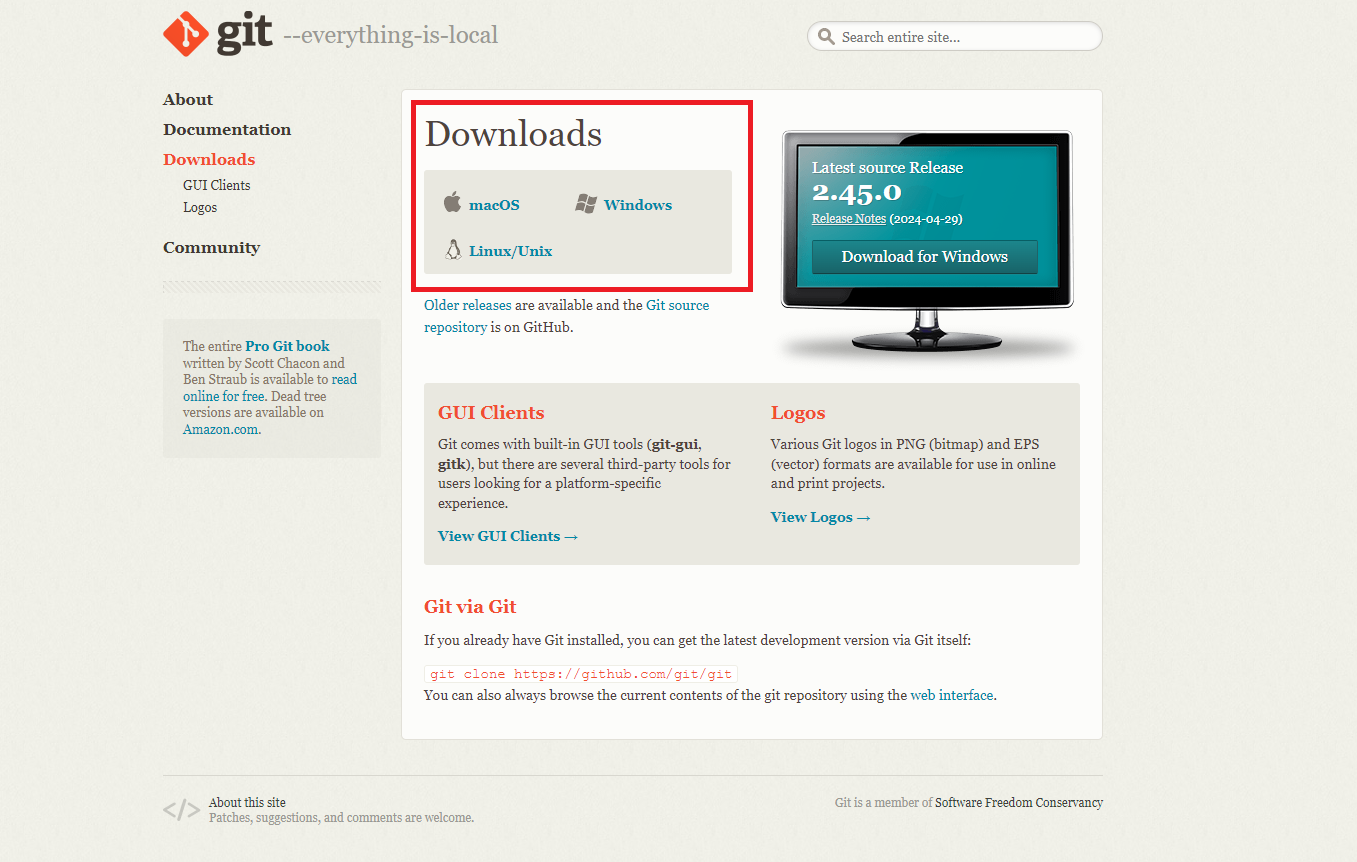
- After Python is installed, repeat Step 1 to confirm the installation. Once verified, proceed to install Git (Download Git), which is necessary for cloning the git file of Stable Diffusion WebUI.
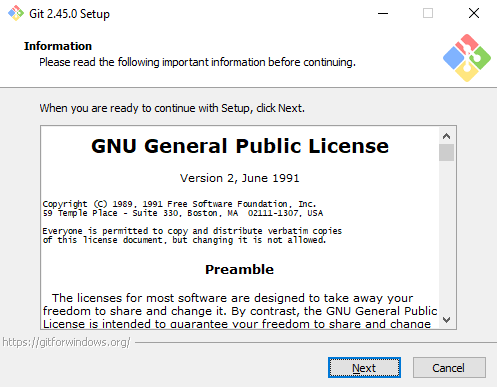
- Similar to Python, run the Git setup file to install it. During the setup, keep the default settings unless you are certain about changing them.
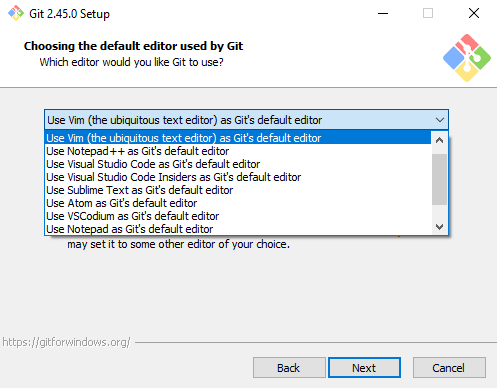
Quick Tip: The default text editor for Git is Vim, which can be complex to use. It’s advisable to switch the text editor to Notepad or Notepad++ during the setup (refer to the image below for guidance).
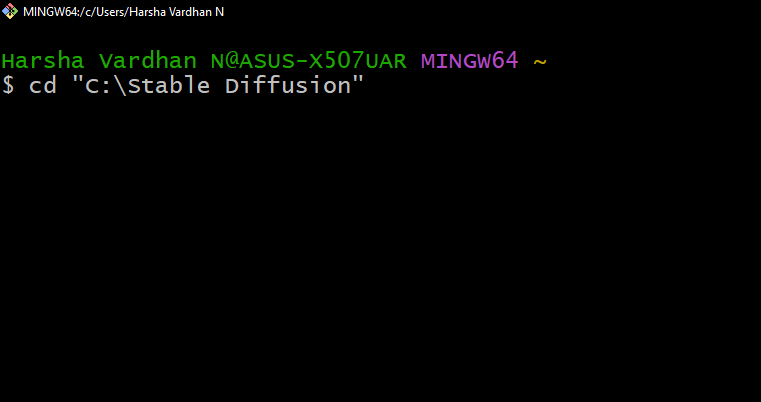
- Now, wait for a while, as Git takes time to install. Once it is complete, there’s no need to verify it, as Git bash will open upon successful installation. Once it opens, enter the following command to change the directory to where you wish to save and install Stable Diffusion.
cd <enter your file path in quotes>
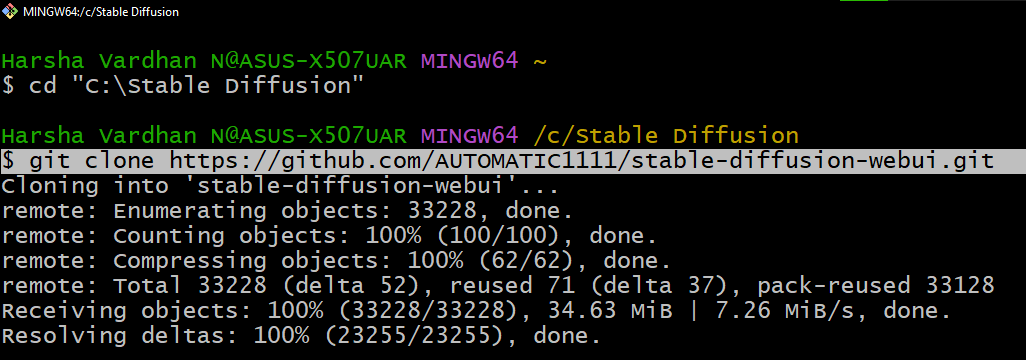
- With the directory changed you can proceed to install Stable Diffusion. Start by cloning Stable Diffusion WebUI. Visit AUTOMATIC111’s Stable Diffusion WebUI page, click on the Code button, and then click Copy to get the clone URL.
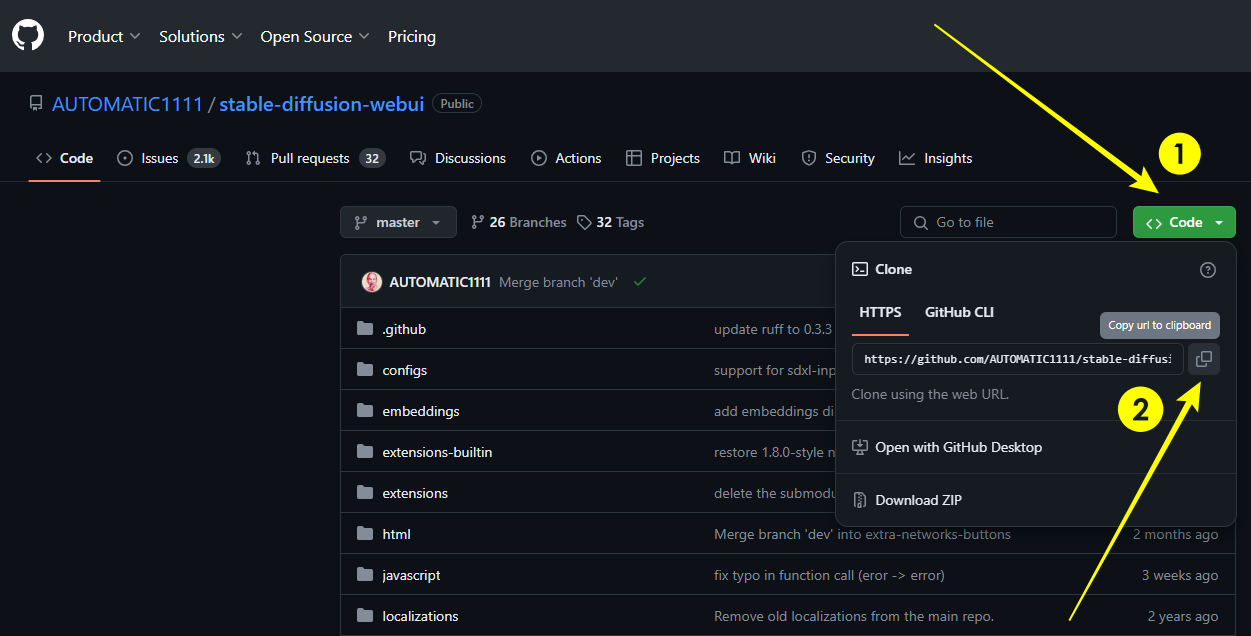
- After copying the URL, paste it into Git bash using the provided command. This process may take some time, so avoid closing it to prevent restarting the download.
git clone <paste AUTOMATIC111's Stable Diffusion WebUI clone URL>
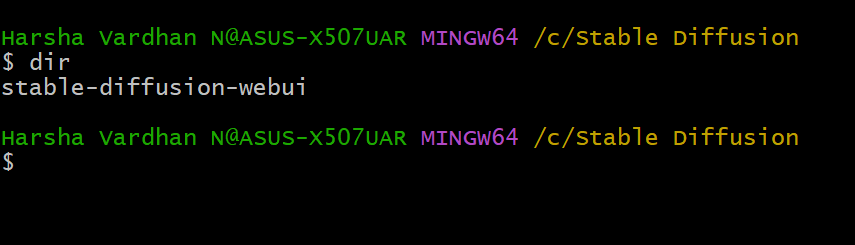
- When the download completes, check if it cloned successfully. Next, type dir and press Enter. Doing so, you should see the Stable Diffusion WebUI file in the folder where it was cloned.
- With Stable Diffusion WebUI successfully cloned, you can proceed with downloading Stable Diffusion XL from Hugging Face. After the webpage is loaded, click on Files and versions and download the model (Refer to the image below for a better understanding).

- Considering the SDXL model is large, we suggest you wait, and once it is downloaded, copy/cut it, open File Explorer, navigate to the Stable Diffusion WebUI root folder and click on models.
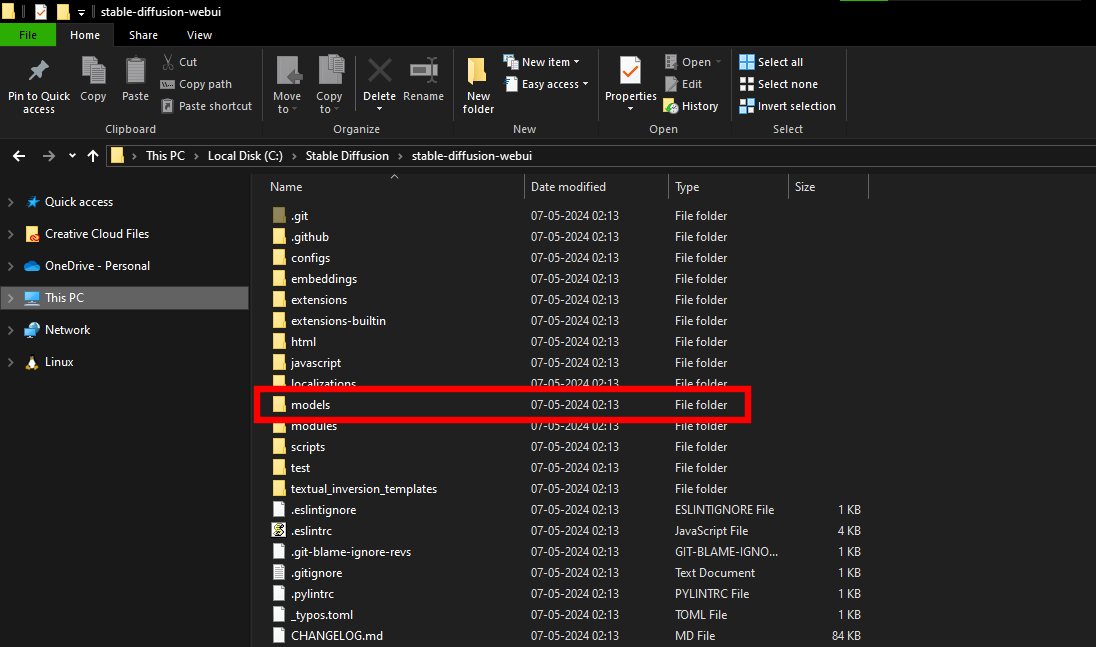
- On opening the model folder, you will find even more from which, look for the folder named Stable-diffusion and open it.
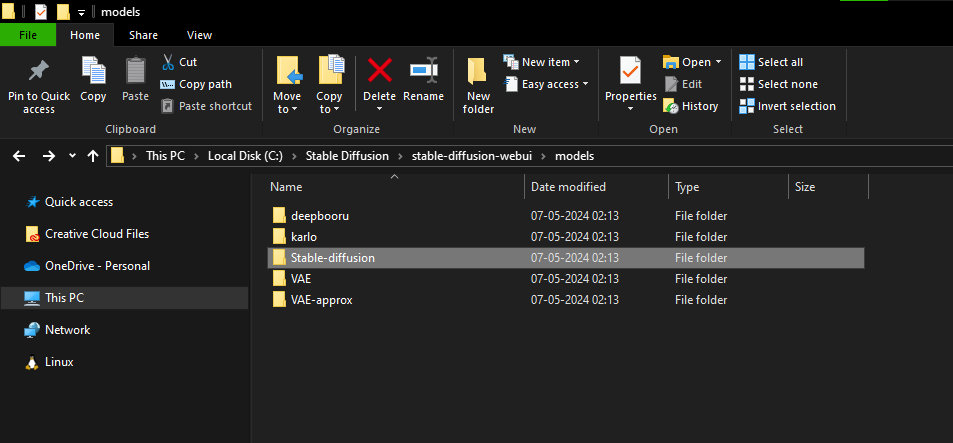
- Doing so, you will find the Put Stable Diffusion checkpoints here text file, and you can paste the downloaded SDXL model file copied earlier.

- Once you have placed the model file in the designated folder, return to the Stable Diffusion WebUI directory and locate the webui-user.bat file. Then, right-click on this file and from the options displayed, click on Edit.

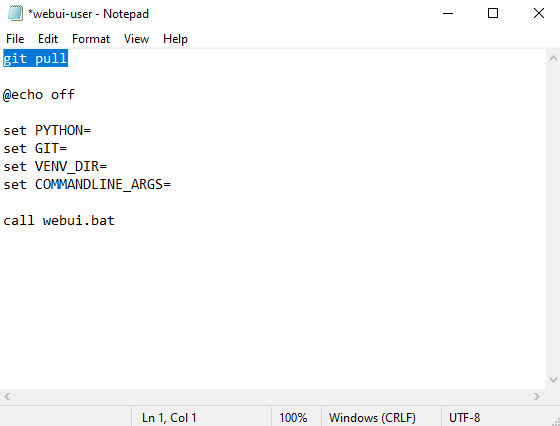
- This will open the file in Notepad. Now, modify the file by inserting git pull text at the beginning, as shown in the image below, to ensure you always load the latest version of Stable Diffusion. Also, don’t forget to save the file after making this change.
- After editing the webui-user.bat file, open it by double-clicking. Wait patiently as various dependencies are downloaded. Once the process is complete, the Local URL will be displayed, and the Stable Diffusion WebUI will open on the browser.
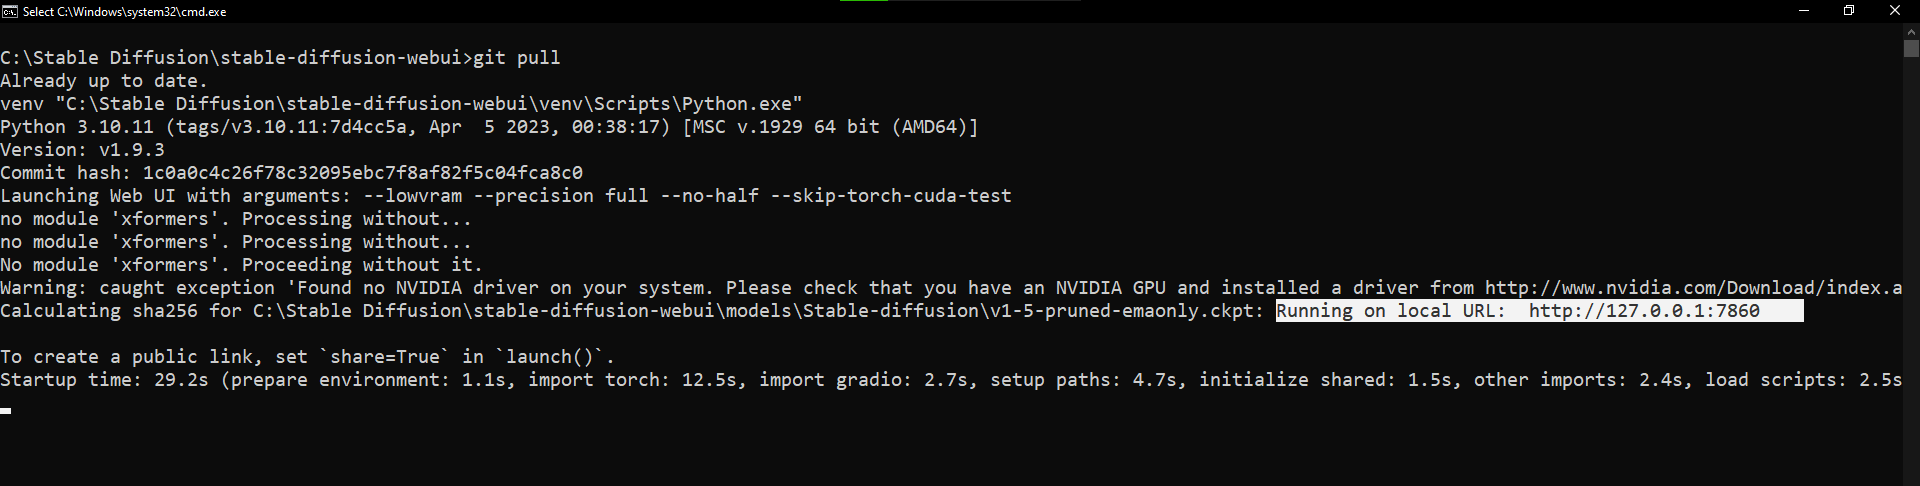
- Typically, after the Local URL appears and the webui-user.bat file completes its execution, Stable Diffusion will open in your default browser. If it doesn’t load automatically, keep the webui-user.bat file running in the background, manually copy the URL, and paste it into your browser.

- With Stable Diffusion WebUI loaded, you’re all ready to generate images. However, before you proceed, ensure that you change/set the checkpoint to Stable Diffusion XL.

Wrapping Up
Congratulations on learning how to install Stable Diffusion XL!
We have done our best to present the steps in a detailed way, and while you can skip the steps that involve installing git or python if already installed, don’t do it with the ones that involve Stable Diffusion WebUI and SDXL unless you have successfully performed them.
Related Reading
How To Install Stable Diffusion
How To Use LoRA Stable Diffusion
How To Use Stable Diffusion for NSFW