LoRA stands for Low-Rank Adaptation of Large Language Models and is preferred for its small file. The LoRA models work together with standard checkpoint models and generate efficient and reliable results.
In this guide, we will get you all covered by downloading a LoRA model, loading it to Stable Diffusion, and generating an image with it.
Steps to Using LoRA Stable Diffusion
Note: Before proceeding with the steps, ensure you have Stable Diffusion installed locally on your device. If you haven’t installed it, check out How To Install Stable Diffusion.
- Start by opening the CivitAI models page on your browser, navigating to Filters, and clicking on it. Now, look for Model types and select LoRA.

- Next, look for the LoRA models that fit your requirements and click on them to open them.

- After the page loads, click on the Download button to download the model. If you do it right, you will find a file with a safetensors extension.
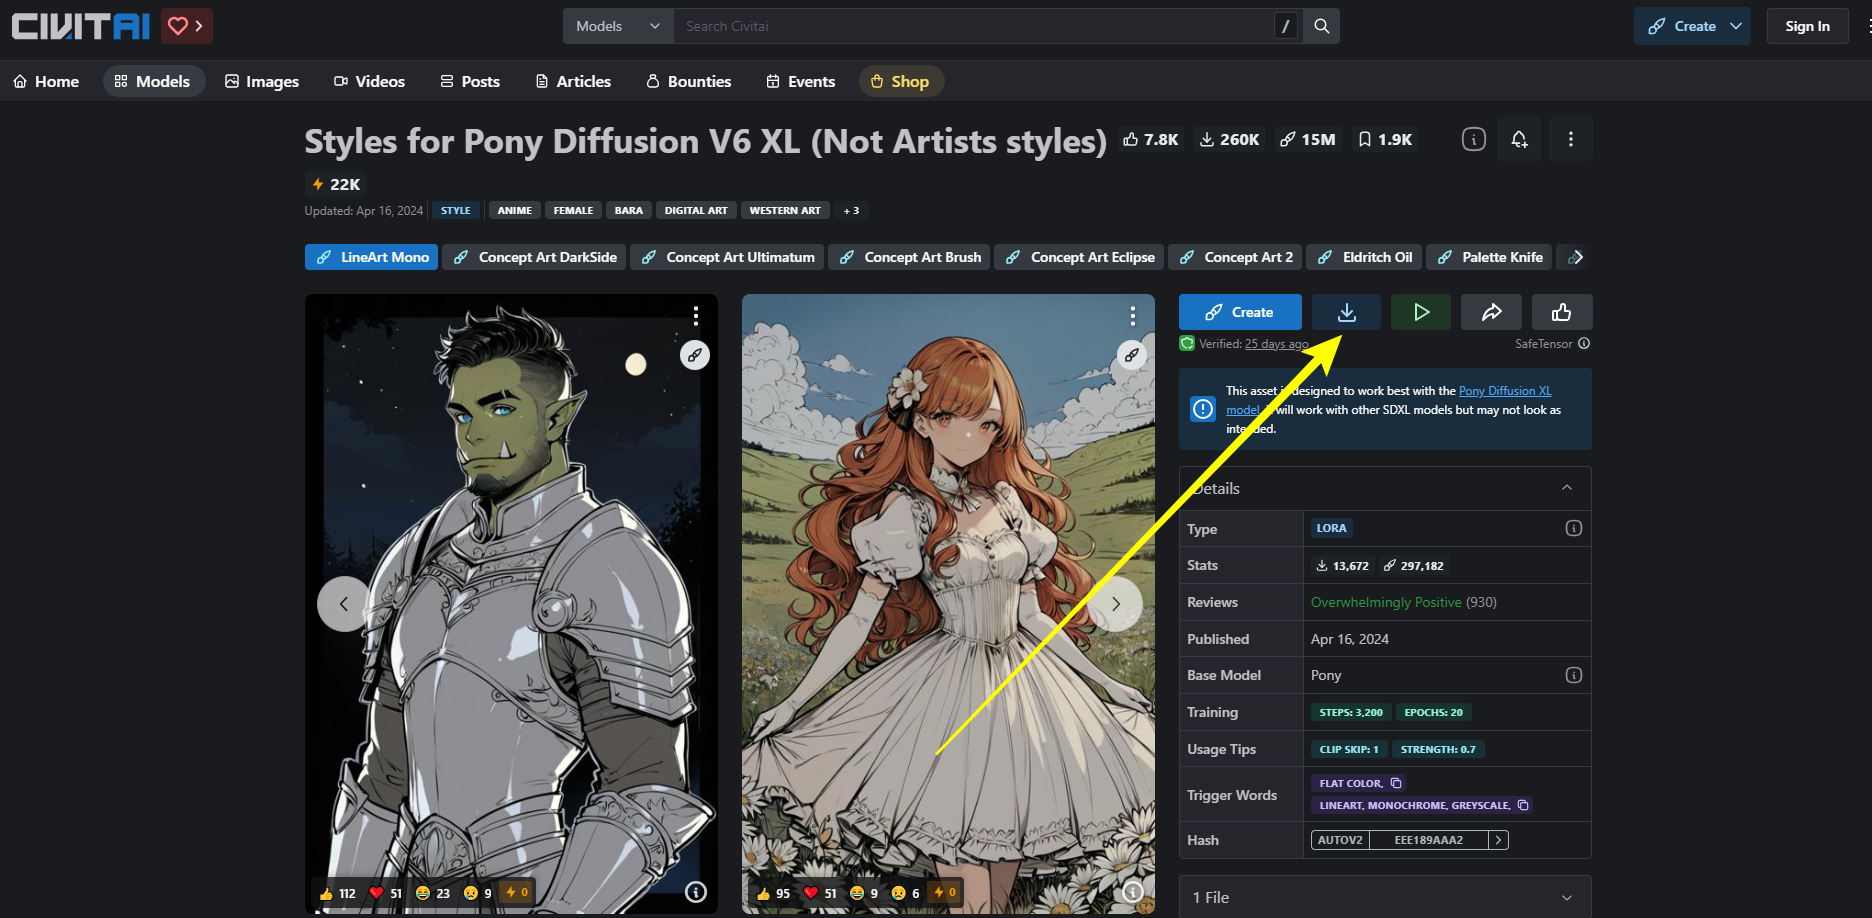
- Once the LoRA model file is downloaded, copy/cut and paste it into the stable-diffusion-webui\models\Lora folder.

- With the LoRA model pasted into the designated folder, it is essential to restart your PC so it can update in the Stable Diffusion WebUI. However, if it doesn’t update, open Settings and click on Extra Networks under Stable Diffusion.

- Once you’re on the Extra Networks page, scroll down to the bottom until you find the option – Always show all networks on the Lora page and enable the checkbox next to it.

- The LoRA models are now updated, but for it to appear on the LoRA page, click on Apply Settings and then Reload UI.

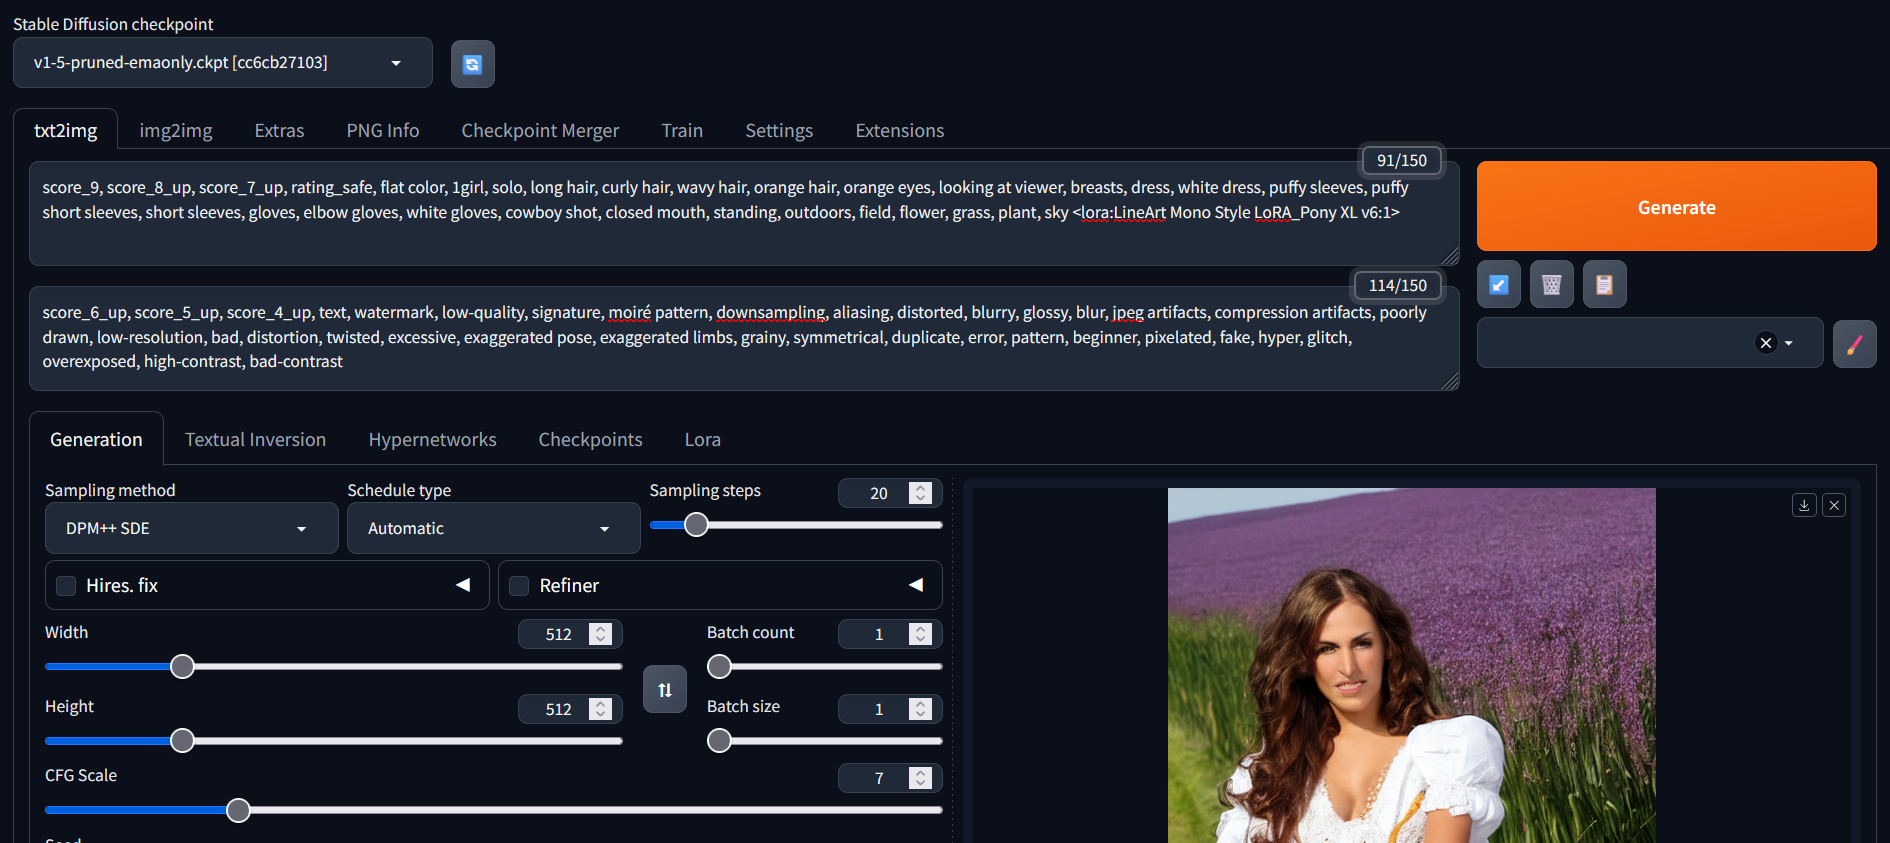
- The LoRA model is ready to use, and while there isn’t an option to turn it on, start by entering the positive and negative prompts. Once done, navigate to the LoRA section and click on the LoRA model you want to work with. Its tag is added at the end of the positive prompt.

- With the tag added successfully, the LoRA model is applied. Now click the Generate button, and you will find the image generated using the Stable Diffusion checkpoint paired with the LoRA model.
Wrapping Up
Congratulations on learning how to use LoRA on Stable Diffusion!
While LoRA is easy to work with, those using Stable Diffusion for the first time have difficulties with adding the models to the WebUI. Considering this is a common issue, we have included Steps 5-7 to address the issue of LoRA models not being displayed.